> ## Documentation Index
> Fetch the complete documentation index at: https://docs.enlazosystems.com/llms.txt
> Use this file to discover all available pages before exploring further.
# Settings Overview
> A full reference of every Proximos setting, organized by Settings window tab.
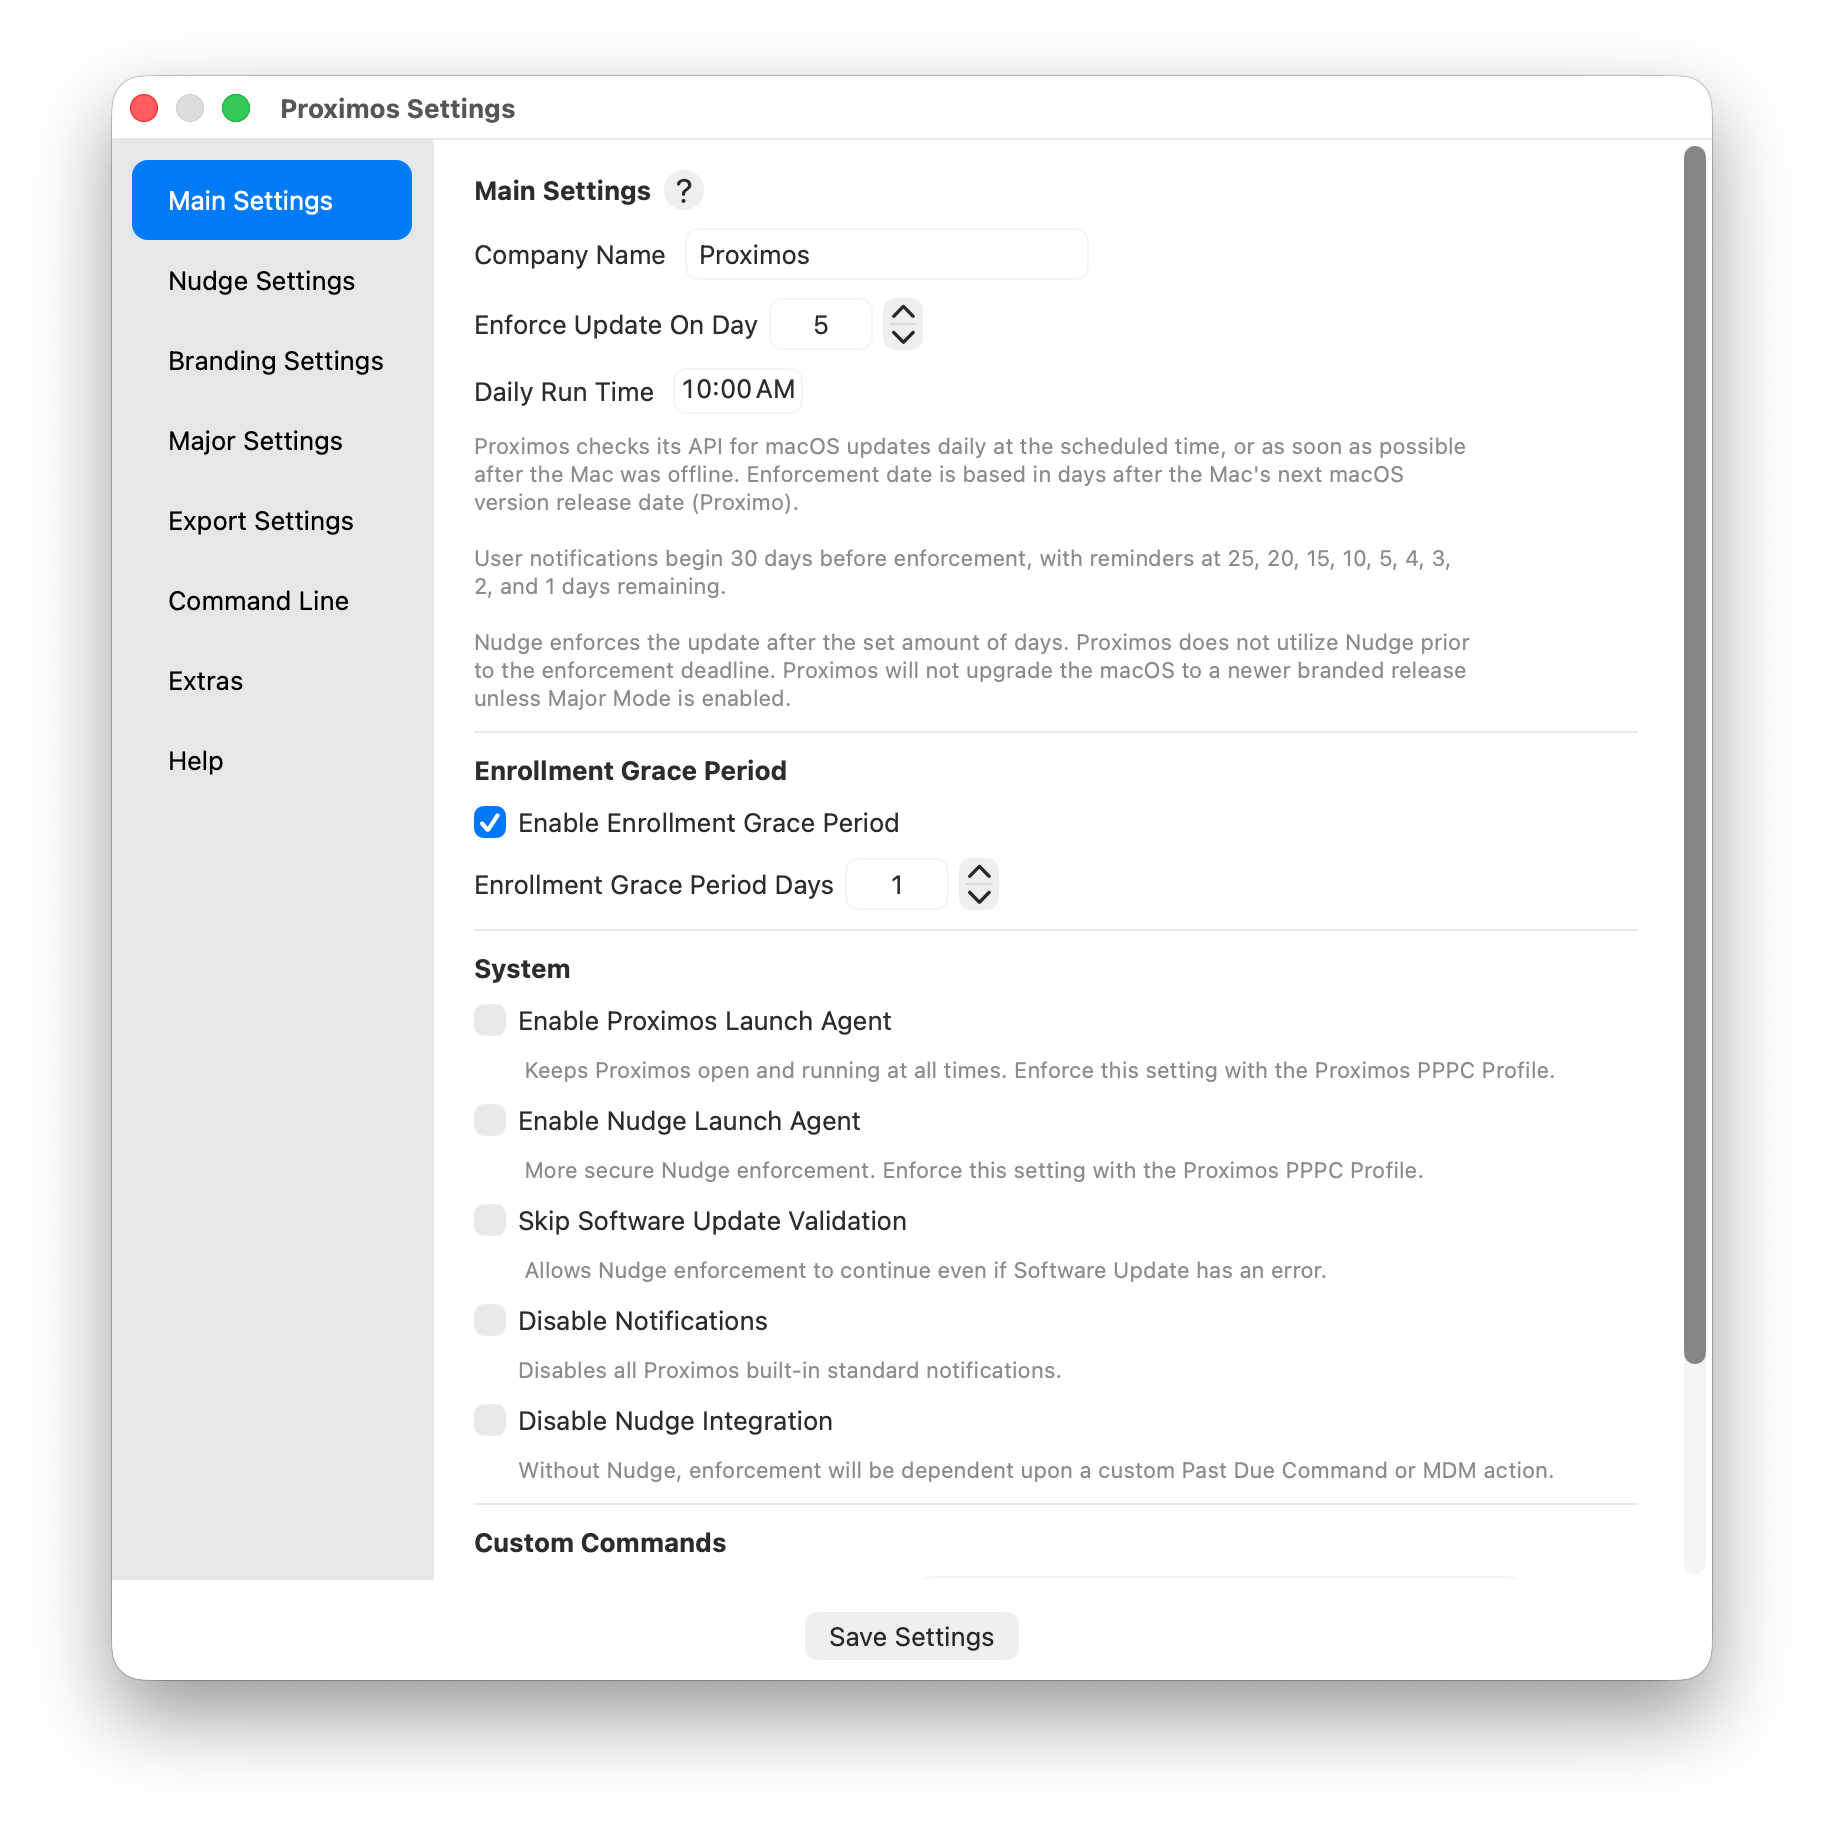
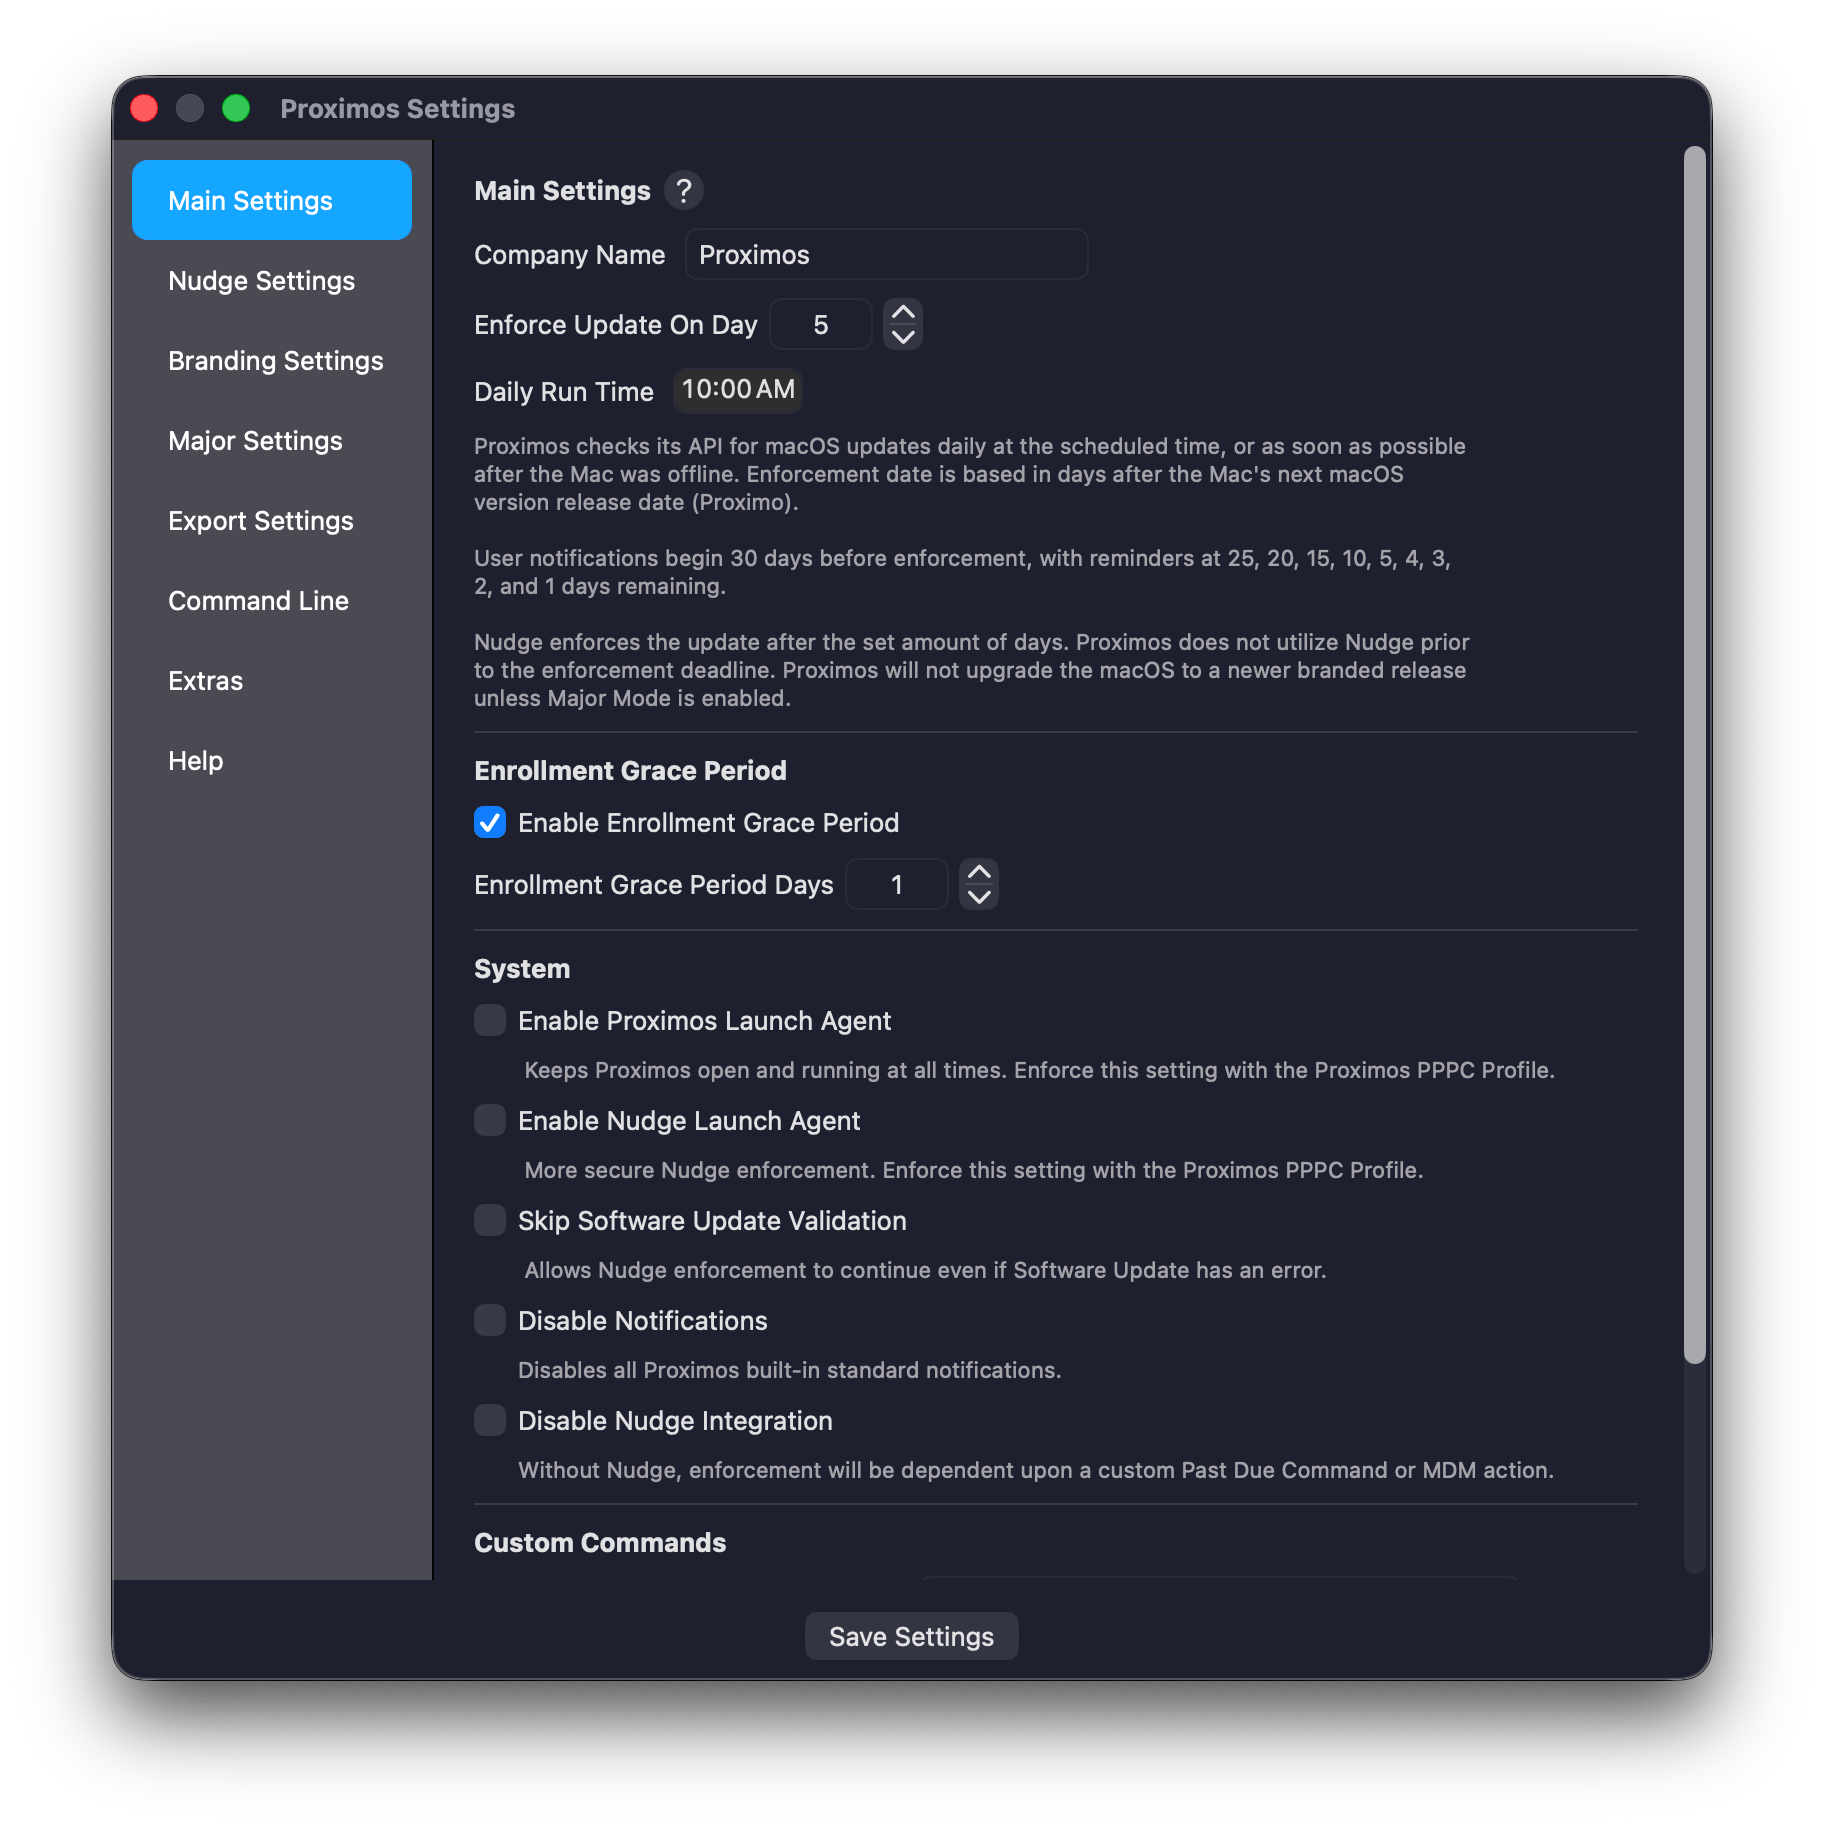 Proximos Settings are accessed by clicking the menu bar icon and selecting **Settings**. The window is titled **Proximos Settings** and uses a sidebar navigation with the following tabs: **Main Settings**, **Nudge Settings**, **Branding Settings**, **Major Settings**, **Export Settings**, **Command Line**, **Extras**, and **Help**. A **Save Settings** button at the bottom saves changes to the settings plist.
In **Managed Mode** (when the settings plist was deployed to `/Library/Managed Preferences/` or `/Library/Preferences/` by an admin or MDM), all controls are read-only, the Save Settings button is disabled, and users cannot access the Settings or License Manager windows or use the Quit menu option.
When no license key is present, all settings controls are disabled. Users can still navigate the sidebar and access the **Uninstall Proximos**, **Check for Proximos Updates**, **Open** (Documentation), and **Email Enlazo** buttons without a license.
***
## Main Settings Tab
The Main Settings tab is organized into four sections: **Main Settings**, **Enrollment Grace Period**, **System**, and **Custom Commands**.
### Main Settings Section
#### Company Name
Your organization's name, displayed in the enrollment welcome notification sent to users when their Mac is first enrolled.
* **Plist key:** `companyName`
* **Default:** `"Proximos"`
#### Enforce Update On Day
The number of days after Apple's official macOS release date before Proximos begins enforcing the update via Nudge. The enforcement deadline is calculated by adding this number to the release date returned by the Proximos Engine API. For example, if set to `5` and Apple releases macOS on a Monday, enforcement begins the following Saturday.
Countdown notifications are sent only at specific milestone days before the deadline: 30, 25, 20, 15, 10, 5, 4, 3, 2, and 1 days remaining. Nudge enforcement begins when the count reaches 0 (the enforcement day) or higher (past due). Proximos does not use Nudge prior to the enforcement deadline.
* **Plist key:** `enforceUpdateOnDay`
* **Default:** `5`
* **Recommended:** 5–14 days depending on your organization's update tolerance
#### Daily Run Time
The time of day at which Proximos performs its automatic update check each day, in 24-hour `HH:MM` format. This time is also baked into the Headless Launch Agent PKG when it is generated.
* **Plist key:** `dailyRunTime`
* **Default:** `"10:00"`
### Enrollment Grace Period Section
#### Enable Enrollment Grace Period
When enabled, newly enrolled Macs are exempt from update enforcement for a configurable number of days. On each day within the grace period, users receive a welcome notification informing them how many days remain before enforcement begins.
* **Plist key:** `enableEnrollmentGracePeriod`
* **Default:** `true`
#### Enrollment Grace Period Days
The number of days a new Mac is exempt from update enforcement after its first Proximos run. The enrollment date is recorded in the user's runtime plist on first run and never resets.
* **Plist key:** `enrollmentGracePeriodDays`
* **Default:** `1`
* **Recommended:** Match your IT onboarding timeline (e.g., 7, 14, or 30 days for new employee setup)
### System Section
#### Enable Proximos Launch Agent
When enabled, Proximos installs and maintains a user-level launch agent (`com.enlazo.proximos`) that keeps the app running in the menu bar persistently. This checkbox is automatically disabled and locked when a System Launch Agent is detected at `/Library/LaunchAgents/com.enlazo.proximos.plist` — the admin-deployed agent already controls the lifecycle. If both a Proximos user-level and IT-deployed system-level launch agent are ever present simultaneously, the internal Proximos Launch Agent Manager resolves the conflict automatically. See [Launch Agent Conflict Resolution](/proximos/mdm-deployment#launch-agent-conflict-resolution) for details.
* **Plist key:** `enableProximosLaunchAgent`
* **Default:** `false`
* **Note:** "Keeps Proximos open and running at all times. Enforce this setting with the Proximos PPPC Profile."
#### Enable Nudge Launch Agent
When enabled, Proximos installs a Nudge launch agent (`com.github.macadmins.Nudge`) for the user when enforcement is triggered, rather than launching Nudge directly. The Nudge agent runs on the `nudgeNagInterval` schedule (configured in Nudge Settings). Provides more persistent Nudge nagging between Proximos daily runs.
* **Plist key:** `enableNudgeLaunchAgent`
* **Default:** `false`
* **Note:** "More secure Nudge enforcement. Enforce this setting with the Proximos PPPC Profile."
#### Skip Software Update Validation
By default, when the enforcement deadline arrives, Proximos runs `softwareupdate --list` to confirm the target macOS version is actually available for this specific Mac before launching Nudge. This prevents Nudge from running on hardware where the update isn't offered.
Enabling this setting skips that check and always proceeds to Nudge enforcement when past the deadline, even if `softwareupdate` has an error or reports no available updates.
* **Plist key:** `disableNudgeSoftwareUpdateMatch`
* **Default:** `false`
* **UI label:** "Skip Software Update Validation"
#### Disable Notifications
Suppresses all Proximos-generated user notification banners, including enrollment welcome messages and countdown alerts. Nudge enforcement after the deadline is not affected.
* **Plist key:** `disableNotifications`
* **Default:** `false`
#### Disable Nudge Integration
Completely disables Nudge JSON configuration writing and Nudge launch agent creation. When enabled, Proximos will run its update check and countdown logic but will never open Nudge — even past the enforcement deadline. Without Nudge, enforcement depends on your own Custom Past Due Command, MDM action, or DDM enforcement.
* **Plist key:** `disableNudgeIntegration`
* **Default:** `false`
### Custom Commands Section
#### Custom Pending Update Command
A shell command (executed via `/bin/zsh -c`) run on each daily check while the Mac is in the countdown window — before the enforcement deadline. Accepts shell commands, osascript, or IBM Notifier commands for custom enforcement actions.
* **Plist key:** `customPendingUpdateCommand`
* **Default:** `""` (disabled)
* **Placeholder:** `sh /path/to/script.sh`
#### Custom Past Due Command
A shell command run on each daily check when the Mac is at or past the enforcement deadline. Fires in addition to Nudge enforcement if Nudge is enabled.
* **Plist key:** `customPastDueCommand`
* **Default:** `""` (disabled)
* **Placeholder:** `sh /path/to/script.sh`
***
## Nudge Settings Tab
The Nudge Settings tab controls the configuration of the bundled [Nudge](https://github.com/macadmins/nudge) enforcement tool. Proximos generates the Nudge JSON configuration automatically from these settings. The tab uses a segmented control to navigate sub-sections: **Optional Features**, **OS Version**, **Update Elements**, **Update Elements (Major)**, **User Experience**, and **User Interface**.
For complete Nudge configuration documentation, refer to the official Nudge wiki at [https://github.com/macadmins/nudge/wiki/optionalFeatures](https://github.com/macadmins/nudge/wiki/optionalFeatures).
Proximos includes support for only a selected subset of all the available Nudge settings. If you find a Nudge option you would like integrated into Proximos, please let us know. However, we consider Proximos 1.0 mostly feature locked until 2.0.
The two Nudge settings that require particular attention in Proximos are:
### Acceptable Application Bundle IDs
A list of application bundle identifiers that Nudge will **not** block or interrupt, even in Aggressive User Experience mode. Applications in this list can remain open and focused while Nudge is displayed.
* **Plist key:** `acceptableApplicationBundleIDs`
* **Default includes:** `com.apple.systempreferences`, `com.tinyspeck.slackmacgap` (Slack), `us.zoom.xos` (Zoom), `com.microsoft.teams`
* **UI:** Managed via an editable list with **+** (Add) and **−** (Remove) buttons. Clicking **+** shows a dialog prompting for a bundle ID.
* **Purpose:** Prevents Nudge from interrupting users during active video calls, screen sharing, or while they are in System Settings actively making the update. Add any mission-critical apps your users depend on.
### Blocked Application Bundle IDs
A list of application bundle identifiers that Nudge will actively block from launching (via terminating on launch) once enforcement begins, preventing users from working around enforcement.
* **Plist key:** `blockedApplicationBundleIDs`
* **Default includes:** `com.apple.Terminal`, `com.googlecode.iterm2`, `com.apple.ActivityMonitor`, `com.1password.1password`, `com.lastpass.LastPass`, `com.apple.keychainaccess`, `com.apple.Passwords`
* **UI:** Same editable list with + and − buttons.
* **Purpose:** Prevents users from killing the Nudge process via Terminal or Activity Monitor to work around enforcement. Also blocks password managers by default — both for security, and as additional encouragement for the user to complete the update rather than continue working around it. Customize based on your organization's security requirements.
### Update Elements (Minor)
The text shown inside the Nudge window during minor macOS update enforcement.
| Field | Description | Default |
| ----------------- | ---------------------------------- | -------------------------------------------------------------------- |
| Language | ISO language code | `en` |
| Main Header | Large headline text | `"Your Mac requires updates!"` |
| Sub Header | Smaller subtitle | `"A friendly reminder from Proximos"` |
| Main Content Text | Body text with update instructions | Pre-configured with instructions to click Update and contact support |
### Update Elements (Major)
The text shown inside the Nudge window during major macOS upgrade enforcement. Configured separately from minor update text.
| Field | Default |
| ----------------- | ----------------------------------------- |
| Main Header | `"A macOS Upgrade is now required."` |
| Sub Header | `"A friendly reminder from Proximos"` |
| Main Content Text | Pre-configured major upgrade instructions |
### User Experience
| Setting | Description | Default |
| --------------------- | ------------------------------------------------------------ | --------------- |
| Elapsed Refresh Cycle | How often (seconds) Nudge re-checks compliance after opening | `1800` (30 min) |
| No Timers | Disables Nudge's internal deferral timers | `false` |
| Nudge Nag Interval | Interval (seconds) for the Nudge LaunchAgent if enabled | `900` (15 min) |
### User Interface
| Setting | Description | Default |
| --------------------- | ---------------------------------------------- | ------- |
| Screenshot Dark Path | Path to a dark-mode screenshot shown in Nudge | `""` |
| Screenshot Light Path | Path to a light-mode screenshot shown in Nudge | `""` |
| Show Deferral Count | Shows users how many times they've deferred | `false` |
| Simple Mode | Enables Nudge's simplified UI layout | `false` |
| Single Quit Button | Shows only one close button in Nudge | `false` |
***
## Branding Settings Tab
Customize Proximos visual elements for your organization. After deploying branding asset files to a common location on your Macs (Proximos recommends `/usr/local/bin` or `/usr/local/images`), select the representative files here so Proximos can identify their locations. Custom branding settings are included in a Settings Export.
Branding is more than cosmetic. A countdown notification or Nudge window that carries your company's logo and name reads as a legitimate, sanctioned IT communication rather than an unfamiliar third-party pop-up — which in our experience meaningfully increases voluntary compliance. It also reinforces your organization's professionalism and can support compliance and audit conversations, since reviewers and end users alike can see at a glance that update enforcement is an intentional, branded part of your IT program rather than an ad hoc script.
### Custom IBM Notifier Location
An optional path to a custom rebranded IBM Notifier application to replace the bundled notifier used for all user-facing alert dialogs. If a custom path is not set or the file does not exist, Proximos falls back to the bundled notifier. See the [IBM Notifier rebranding guide](https://github.com/IBM/mac-ibm-notifications/wiki/Rebranding-the-application) for details on rebranding Proximos notifications with your logo.
When deploying a custom IBM Notifier, a matching [custom PPPC notifications profile](https://github.com/IBM/mac-ibm-notifications/blob/main/example%20profiles/IBM%20Notifier%20Notifications.mobileconfig) must also be created and deployed via MDM to authorize the rebranded app to display notifications. The link to this profile template is available in **Settings → Branding Settings**.
> **Note:** A custom rebranded IBM Notifier application does not require signing with an Apple Developer certificate if it is deployed to managed Macs inside a custom `.pkg` via a genuine MDM such as Jamf Pro, Intune, or Addigy. Enlazo Systems recommends using the `pkgbuild` command line tool or [Jamf Composer](https://www.jamf.com/products/jamf-composer/) to build the installer package for your custom branded IBM Notifier. Some MDM's include PKG building wizards you can utilize.
**Building a custom rebranded IBM Notifier:** Rebranding IBM Notifier means recompiling it from source with your own app icon, notification icon, and display name substituted in for IBM's defaults. This requires Xcode installed on a build Mac, and is otherwise a quick process — most of the effort is in preparing the icon assets themselves (an `.icns` app icon and any notification image assets at the correct sizes) rather than the build step. If your design team already has properly sized icon assets ready to go, the rebuild itself can typically be completed in around 30 minutes by someone comfortable opening a project in Xcode and running a build. If you don't have in-house design or build resources, any contract Mac developer or design freelancer experienced with Xcode can typically perform a rebrand from your icon files in a single short engagement.
> Note: For creating your branded logo icon used in IBM Notifier, we'd recommend starting with an online PNG to ICNS converter like [Cloud Convert PNG to ICNS](https://cloudconvert.com/png-to-icns) and [Candy Icons Icon Assets Generator](https://www.candyicons.com/free-tools/app-icon-assets-generator) to convert your existing brand logo into a Mac icon format file; in the various different sizes needed for XCode IBM Notifier. You may need to add background transparency to your current logo (make it a cutout), which AI or [Photopea](https://photopea.com) can help with.
**Why do I need to build a Custom IBM Notifier?**
Proximos Settings are accessed by clicking the menu bar icon and selecting **Settings**. The window is titled **Proximos Settings** and uses a sidebar navigation with the following tabs: **Main Settings**, **Nudge Settings**, **Branding Settings**, **Major Settings**, **Export Settings**, **Command Line**, **Extras**, and **Help**. A **Save Settings** button at the bottom saves changes to the settings plist.
In **Managed Mode** (when the settings plist was deployed to `/Library/Managed Preferences/` or `/Library/Preferences/` by an admin or MDM), all controls are read-only, the Save Settings button is disabled, and users cannot access the Settings or License Manager windows or use the Quit menu option.
When no license key is present, all settings controls are disabled. Users can still navigate the sidebar and access the **Uninstall Proximos**, **Check for Proximos Updates**, **Open** (Documentation), and **Email Enlazo** buttons without a license.
***
## Main Settings Tab
The Main Settings tab is organized into four sections: **Main Settings**, **Enrollment Grace Period**, **System**, and **Custom Commands**.
### Main Settings Section
#### Company Name
Your organization's name, displayed in the enrollment welcome notification sent to users when their Mac is first enrolled.
* **Plist key:** `companyName`
* **Default:** `"Proximos"`
#### Enforce Update On Day
The number of days after Apple's official macOS release date before Proximos begins enforcing the update via Nudge. The enforcement deadline is calculated by adding this number to the release date returned by the Proximos Engine API. For example, if set to `5` and Apple releases macOS on a Monday, enforcement begins the following Saturday.
Countdown notifications are sent only at specific milestone days before the deadline: 30, 25, 20, 15, 10, 5, 4, 3, 2, and 1 days remaining. Nudge enforcement begins when the count reaches 0 (the enforcement day) or higher (past due). Proximos does not use Nudge prior to the enforcement deadline.
* **Plist key:** `enforceUpdateOnDay`
* **Default:** `5`
* **Recommended:** 5–14 days depending on your organization's update tolerance
#### Daily Run Time
The time of day at which Proximos performs its automatic update check each day, in 24-hour `HH:MM` format. This time is also baked into the Headless Launch Agent PKG when it is generated.
* **Plist key:** `dailyRunTime`
* **Default:** `"10:00"`
### Enrollment Grace Period Section
#### Enable Enrollment Grace Period
When enabled, newly enrolled Macs are exempt from update enforcement for a configurable number of days. On each day within the grace period, users receive a welcome notification informing them how many days remain before enforcement begins.
* **Plist key:** `enableEnrollmentGracePeriod`
* **Default:** `true`
#### Enrollment Grace Period Days
The number of days a new Mac is exempt from update enforcement after its first Proximos run. The enrollment date is recorded in the user's runtime plist on first run and never resets.
* **Plist key:** `enrollmentGracePeriodDays`
* **Default:** `1`
* **Recommended:** Match your IT onboarding timeline (e.g., 7, 14, or 30 days for new employee setup)
### System Section
#### Enable Proximos Launch Agent
When enabled, Proximos installs and maintains a user-level launch agent (`com.enlazo.proximos`) that keeps the app running in the menu bar persistently. This checkbox is automatically disabled and locked when a System Launch Agent is detected at `/Library/LaunchAgents/com.enlazo.proximos.plist` — the admin-deployed agent already controls the lifecycle. If both a Proximos user-level and IT-deployed system-level launch agent are ever present simultaneously, the internal Proximos Launch Agent Manager resolves the conflict automatically. See [Launch Agent Conflict Resolution](/proximos/mdm-deployment#launch-agent-conflict-resolution) for details.
* **Plist key:** `enableProximosLaunchAgent`
* **Default:** `false`
* **Note:** "Keeps Proximos open and running at all times. Enforce this setting with the Proximos PPPC Profile."
#### Enable Nudge Launch Agent
When enabled, Proximos installs a Nudge launch agent (`com.github.macadmins.Nudge`) for the user when enforcement is triggered, rather than launching Nudge directly. The Nudge agent runs on the `nudgeNagInterval` schedule (configured in Nudge Settings). Provides more persistent Nudge nagging between Proximos daily runs.
* **Plist key:** `enableNudgeLaunchAgent`
* **Default:** `false`
* **Note:** "More secure Nudge enforcement. Enforce this setting with the Proximos PPPC Profile."
#### Skip Software Update Validation
By default, when the enforcement deadline arrives, Proximos runs `softwareupdate --list` to confirm the target macOS version is actually available for this specific Mac before launching Nudge. This prevents Nudge from running on hardware where the update isn't offered.
Enabling this setting skips that check and always proceeds to Nudge enforcement when past the deadline, even if `softwareupdate` has an error or reports no available updates.
* **Plist key:** `disableNudgeSoftwareUpdateMatch`
* **Default:** `false`
* **UI label:** "Skip Software Update Validation"
#### Disable Notifications
Suppresses all Proximos-generated user notification banners, including enrollment welcome messages and countdown alerts. Nudge enforcement after the deadline is not affected.
* **Plist key:** `disableNotifications`
* **Default:** `false`
#### Disable Nudge Integration
Completely disables Nudge JSON configuration writing and Nudge launch agent creation. When enabled, Proximos will run its update check and countdown logic but will never open Nudge — even past the enforcement deadline. Without Nudge, enforcement depends on your own Custom Past Due Command, MDM action, or DDM enforcement.
* **Plist key:** `disableNudgeIntegration`
* **Default:** `false`
### Custom Commands Section
#### Custom Pending Update Command
A shell command (executed via `/bin/zsh -c`) run on each daily check while the Mac is in the countdown window — before the enforcement deadline. Accepts shell commands, osascript, or IBM Notifier commands for custom enforcement actions.
* **Plist key:** `customPendingUpdateCommand`
* **Default:** `""` (disabled)
* **Placeholder:** `sh /path/to/script.sh`
#### Custom Past Due Command
A shell command run on each daily check when the Mac is at or past the enforcement deadline. Fires in addition to Nudge enforcement if Nudge is enabled.
* **Plist key:** `customPastDueCommand`
* **Default:** `""` (disabled)
* **Placeholder:** `sh /path/to/script.sh`
***
## Nudge Settings Tab
The Nudge Settings tab controls the configuration of the bundled [Nudge](https://github.com/macadmins/nudge) enforcement tool. Proximos generates the Nudge JSON configuration automatically from these settings. The tab uses a segmented control to navigate sub-sections: **Optional Features**, **OS Version**, **Update Elements**, **Update Elements (Major)**, **User Experience**, and **User Interface**.
For complete Nudge configuration documentation, refer to the official Nudge wiki at [https://github.com/macadmins/nudge/wiki/optionalFeatures](https://github.com/macadmins/nudge/wiki/optionalFeatures).
Proximos includes support for only a selected subset of all the available Nudge settings. If you find a Nudge option you would like integrated into Proximos, please let us know. However, we consider Proximos 1.0 mostly feature locked until 2.0.
The two Nudge settings that require particular attention in Proximos are:
### Acceptable Application Bundle IDs
A list of application bundle identifiers that Nudge will **not** block or interrupt, even in Aggressive User Experience mode. Applications in this list can remain open and focused while Nudge is displayed.
* **Plist key:** `acceptableApplicationBundleIDs`
* **Default includes:** `com.apple.systempreferences`, `com.tinyspeck.slackmacgap` (Slack), `us.zoom.xos` (Zoom), `com.microsoft.teams`
* **UI:** Managed via an editable list with **+** (Add) and **−** (Remove) buttons. Clicking **+** shows a dialog prompting for a bundle ID.
* **Purpose:** Prevents Nudge from interrupting users during active video calls, screen sharing, or while they are in System Settings actively making the update. Add any mission-critical apps your users depend on.
### Blocked Application Bundle IDs
A list of application bundle identifiers that Nudge will actively block from launching (via terminating on launch) once enforcement begins, preventing users from working around enforcement.
* **Plist key:** `blockedApplicationBundleIDs`
* **Default includes:** `com.apple.Terminal`, `com.googlecode.iterm2`, `com.apple.ActivityMonitor`, `com.1password.1password`, `com.lastpass.LastPass`, `com.apple.keychainaccess`, `com.apple.Passwords`
* **UI:** Same editable list with + and − buttons.
* **Purpose:** Prevents users from killing the Nudge process via Terminal or Activity Monitor to work around enforcement. Also blocks password managers by default — both for security, and as additional encouragement for the user to complete the update rather than continue working around it. Customize based on your organization's security requirements.
### Update Elements (Minor)
The text shown inside the Nudge window during minor macOS update enforcement.
| Field | Description | Default |
| ----------------- | ---------------------------------- | -------------------------------------------------------------------- |
| Language | ISO language code | `en` |
| Main Header | Large headline text | `"Your Mac requires updates!"` |
| Sub Header | Smaller subtitle | `"A friendly reminder from Proximos"` |
| Main Content Text | Body text with update instructions | Pre-configured with instructions to click Update and contact support |
### Update Elements (Major)
The text shown inside the Nudge window during major macOS upgrade enforcement. Configured separately from minor update text.
| Field | Default |
| ----------------- | ----------------------------------------- |
| Main Header | `"A macOS Upgrade is now required."` |
| Sub Header | `"A friendly reminder from Proximos"` |
| Main Content Text | Pre-configured major upgrade instructions |
### User Experience
| Setting | Description | Default |
| --------------------- | ------------------------------------------------------------ | --------------- |
| Elapsed Refresh Cycle | How often (seconds) Nudge re-checks compliance after opening | `1800` (30 min) |
| No Timers | Disables Nudge's internal deferral timers | `false` |
| Nudge Nag Interval | Interval (seconds) for the Nudge LaunchAgent if enabled | `900` (15 min) |
### User Interface
| Setting | Description | Default |
| --------------------- | ---------------------------------------------- | ------- |
| Screenshot Dark Path | Path to a dark-mode screenshot shown in Nudge | `""` |
| Screenshot Light Path | Path to a light-mode screenshot shown in Nudge | `""` |
| Show Deferral Count | Shows users how many times they've deferred | `false` |
| Simple Mode | Enables Nudge's simplified UI layout | `false` |
| Single Quit Button | Shows only one close button in Nudge | `false` |
***
## Branding Settings Tab
Customize Proximos visual elements for your organization. After deploying branding asset files to a common location on your Macs (Proximos recommends `/usr/local/bin` or `/usr/local/images`), select the representative files here so Proximos can identify their locations. Custom branding settings are included in a Settings Export.
Branding is more than cosmetic. A countdown notification or Nudge window that carries your company's logo and name reads as a legitimate, sanctioned IT communication rather than an unfamiliar third-party pop-up — which in our experience meaningfully increases voluntary compliance. It also reinforces your organization's professionalism and can support compliance and audit conversations, since reviewers and end users alike can see at a glance that update enforcement is an intentional, branded part of your IT program rather than an ad hoc script.
### Custom IBM Notifier Location
An optional path to a custom rebranded IBM Notifier application to replace the bundled notifier used for all user-facing alert dialogs. If a custom path is not set or the file does not exist, Proximos falls back to the bundled notifier. See the [IBM Notifier rebranding guide](https://github.com/IBM/mac-ibm-notifications/wiki/Rebranding-the-application) for details on rebranding Proximos notifications with your logo.
When deploying a custom IBM Notifier, a matching [custom PPPC notifications profile](https://github.com/IBM/mac-ibm-notifications/blob/main/example%20profiles/IBM%20Notifier%20Notifications.mobileconfig) must also be created and deployed via MDM to authorize the rebranded app to display notifications. The link to this profile template is available in **Settings → Branding Settings**.
> **Note:** A custom rebranded IBM Notifier application does not require signing with an Apple Developer certificate if it is deployed to managed Macs inside a custom `.pkg` via a genuine MDM such as Jamf Pro, Intune, or Addigy. Enlazo Systems recommends using the `pkgbuild` command line tool or [Jamf Composer](https://www.jamf.com/products/jamf-composer/) to build the installer package for your custom branded IBM Notifier. Some MDM's include PKG building wizards you can utilize.
**Building a custom rebranded IBM Notifier:** Rebranding IBM Notifier means recompiling it from source with your own app icon, notification icon, and display name substituted in for IBM's defaults. This requires Xcode installed on a build Mac, and is otherwise a quick process — most of the effort is in preparing the icon assets themselves (an `.icns` app icon and any notification image assets at the correct sizes) rather than the build step. If your design team already has properly sized icon assets ready to go, the rebuild itself can typically be completed in around 30 minutes by someone comfortable opening a project in Xcode and running a build. If you don't have in-house design or build resources, any contract Mac developer or design freelancer experienced with Xcode can typically perform a rebrand from your icon files in a single short engagement.
> Note: For creating your branded logo icon used in IBM Notifier, we'd recommend starting with an online PNG to ICNS converter like [Cloud Convert PNG to ICNS](https://cloudconvert.com/png-to-icns) and [Candy Icons Icon Assets Generator](https://www.candyicons.com/free-tools/app-icon-assets-generator) to convert your existing brand logo into a Mac icon format file; in the various different sizes needed for XCode IBM Notifier. You may need to add background transparency to your current logo (make it a cutout), which AI or [Photopea](https://photopea.com) can help with.
**Why do I need to build a Custom IBM Notifier?**
Apple only allows **genuine** macOS apps to **produce macOS notifications** that are shown in the top right of the screen and Noticiation Center. This is to prevent viruses, bots, and malware from generating fake notifications impersonating real apps or services. As a quick workaround to building your own custom IBM Notifier, you can still set the "Custom Notification Icon" Custom Branding setting seen below, which can add a small branding image to the built-in Proximos Notifications. The Proximos Notifications icon will still be the Proximos icon.
* **Plist key:** `customNotiferLocation`
* **Default:** Bundled notifier at `Proximos.app/Contents/Resources/Proximos Notifier.app`
### Custom Nudge Logo Location
An optional path to a custom logo image file (PNG, JPEG, or ICNS). This is the main image displayed in the Nudge window in both Standard and Simple modes during enforcement.
* **Plist key:** `customLogoLocation`
* **Default:** Bundled `Logo.png`
### Custom Notification Icon Location
An optional path to a custom image file displayed on the right side of enrollment and countdown notification banners.
* **Plist key:** `customNotificationIconLocation`
* **Default:** `""` (none)
### Custom Enrollment Message
An optional custom static message shown to users in the enrollment welcome notification. If not set, Proximos generates a default message using your configured Company Name: *"Welcome! \[Company Name] has enrolled your Mac into macOS update management. Any available updates will begin installing in \[X] days..."*
* **Plist key:** `customEnrollmentMessage`
* **Default:** `nil` (auto-generated)
### Custom Daily Notifications
For fully customized daily countdown notifications beyond what the settings provide, deploy the **Custom Notifications Script** from the MDM Scripts bundle to a common location on your Macs, then enter the script path as a **Custom Pending Update Command** in Main Settings. Alternatively, add and schedule the script directly with your MDM solution. See [Proximos Custom Notifications.sh](/proximos/extra-mdm-scripts#proximos-custom-notificationssh) in the Extra MDM Scripts section for full details..
***
## Major Settings Tab
Major Settings control enforcement of a full macOS upgrade (e.g., macOS 15 Sequoia → macOS 26 Tahoe). By default, Proximos keeps every Mac on the latest minor release of its current macOS version indefinitely — it will never push a major upgrade unless Major Mode is explicitly enabled here. It is also possible to perform the major upgrade via DDM (Declarative Device Management) through your MDM solution independently of Proximos; once the Mac upgrades to the new major version, Proximos will automatically detect the change and continue enforcing minor updates for the new release line as normal.
When enabled, Major Mode is flexible enough to handle a range of real-world scenarios. Macs that have fallen behind by several major versions are handled automatically — Proximos detects the current device version, compares it to the target, and begins enforcing the upgrade regardless of how many versions behind the Mac is. You can also preschedule a future upgrade well in advance: set your target major version and enforcement date now, and Proximos will begin counting down for users at the appropriate time.
The release name of the target macOS (e.g., "Tahoe") is detected automatically by querying `softwareupdate --list-full-installers` — no hardcoded name table is required. This means Major Mode works with future macOS releases without needing a Proximos update.
Once a Mac successfully upgrades to the target major version, Proximos detects this automatically and seamlessly transitions back to standard minor update enforcement for the new release line — so leaving Major Mode enabled after the upgrade is complete is safe and expected. Minor updates continue as normal. (We still recommend disabling Major Mode with an updated settings file once your fleet has completed the major upgrade, to keep your configuration clean and ready for the next major release cycle.)
For organizations that need to bypass the Nudge interaction entirely and push a fully automated silent upgrade — with no user password prompt or confirmation — the [Proximos startosinstall Major Enforce.sh](/proximos/extra-mdm-scripts#proximos-startosinstall-major-enforcesh) script in the Extra MDM Scripts bundle provides that capability when deployed via your MDM solution. This is particularly useful for unattended or headless Macs, or as an additional forcing function for users who are past due and have not acted on Nudge enforcement.
The tab uses a segmented control with three sub-sections: **General**, **Nudge Major Update Elements**, and **Nudge Major Button Action**. The Nudge sub-sections are only enabled when Major Mode is turned on.
### General Sub-Section
#### Enable Major Mode
Activates the Major Upgrade Engine. When enabled, Proximos runs the major upgrade workflow (the Major Engine) instead of the standard minor update check. If the device is already on the target major version, the engine automatically falls through to run the standard minor update check for the current release line.
* **Plist key:** `enableMajorMode`
* **Default:** `false`
#### Major Version to Enforce
The macOS major version integer to enforce (e.g., `26` for macOS Tahoe). Proximos uses this value to:
* Determine if the device needs a major upgrade
* Query `softwareupdate --list-full-installers` to identify the correct installer
* Download the installer to `/Applications/Install macOS [Name].app` via `softwareupdate` directly from Apple if not already present
* Configure Nudge with the correct `requiredMinimumOSVersion`
* **Plist key:** `majorVersionToEnforce`
* **Type:** Integer (e.g., `26`)
* **Default:** `26`
#### Enforce Major Release Date
Unlike minor mode — where the enforcement deadline is calculated automatically from Apple's patch release date — Major Mode lets you set your own enforcement date entirely. Pick the date that works for your organization and upgrade your fleet when you're ready. Proximos will count down to that date and begin Nudge enforcement once it arrives, giving users the same milestone notification experience as minor updates.
* **Plist key:** `enforceMajorReleaseDate`
* **Type:** Date
### Nudge Major Button Action Sub-Section
#### Enable Nudge Action Upgrade Button
When enabled, Nudge displays a custom action button pointing to a URL you specify, instead of launching the macOS installer directly. Used for Jamf Self Service or Munki-based upgrade workflows.
* **Plist key:** `enableNudgeActionUpgradeButton`
* **Default:** `false`
#### Nudge Action URL
The URL used when **Enable Nudge Action Upgrade Button** is enabled. Accepts Jamf Self Service deep links or Munki update links.
* **Plist key:** `nudgeActionURL`
* **Default:** `"jamfselfservice://example or munki://updates"`
***
## Export Settings Tab
The Export Settings tab is dedicated to generating deployable files from your current Proximos configuration. All exports require Xcode Command Line Tools to be installed for the `.pkg` build step.
### Export Settings as a .plist
Saves all current settings as a standard XML plist file named `com.enlazo.proximos.settings.plist`. Use this for backup, MDM Configuration Profile upload, or manual distribution.
**Button:** **Export as .plist…**
### Export Settings as .pkg
Packages the current settings as a flat installer `.pkg` that installs `com.enlazo.proximos.settings.plist` to `/Library/Preferences/` on the target Mac, activating Managed Mode.
**Button:** **Export as .pkg…** **Output filename:** `Proximos Settings.pkg`
### Managed Mode
A note anchored at the bottom of the Export Settings tab explains Managed Mode behavior and provides Jamf Pro-specific deployment instructions:
When Proximos detects a plist deployed via a `.pkg` installer or MDM solution, it enables Managed Mode. In Managed Mode, users cannot access the Settings or License Manager windows, or the Quit menu option.
**For Jamf Pro Configuration Profile deployment:** Go to **Computers → Configuration Profiles → + New → Application & Custom Settings → Upload → + Add → Click Upload → Select your exported `.plist` file**. Set the Preference Domain to `com.enlazo.proximos.settings`.
> **Recommendation:** When possible, deploy the settings plist as a custom configuration profile into `/Library/Managed Preferences/` instead of using a script or PKG. A file written to `/Library/Preferences/` can be deleted by a local administrator, temporarily removing Managed Mode. Configuration profiles delivered through your MDM to `/Library/Managed Preferences/` are protected from user removal. If your MDM does not support custom configuration profiles and you must use a script or PKG, we recommend re-running the deployment script on every MDM policy check-in to ensure the file is always present.
> **Recommendation:** Always create and modify your settings file using the Proximos application's own export tools rather than hand-editing the XML plist in a text editor. A manually introduced syntax error or invalid value will cause Proximos to become inoperable until a corrected file is redeployed — see [Handling a Corrupted or Misconfigured Settings File](/proximos/logic-overview#handling-a-corrupted-or-misconfigured-settings-file) in the Logic Overview for what happens and how to recover.
***
## Extras Tab
The Extras tab provides tools for deploying supporting infrastructure: PPPC profiles, system launch agents, and the MDM scripts bundle.
### Proximos PPPC Profiles
PPPC (Privacy Preferences Policy Control) profiles grant the required system permissions for Proximos notifications and enforcement to function correctly. Three buttons are available:
* **Install Notifications Profile** — Installs the notifications-only PPPC profile directly on the local Mac by opening it with System Settings → Profiles. Use this on your IT admin Mac or in environments without an MDM.
* **Export Notifications Profile** — Saves `Proximos PPPC Notifications Only.mobileconfig` for deployment via your MDM solution.
* **Export Full Profile** — Saves `Proximos PPPC Profile.mobileconfig`, which covers full Proximos functionality including notifications and launch agent permissions. Deploy this through your MDM for complete coverage.
> For full functionality, deploy the Full PPPC profile through your MDM. If you do not use an MDM, Apple allows notification profiles to be installed manually on each Mac using the **Install Notifications Profile** button, or by double-clicking the exported profile file and approving it in System Settings.
### System Launch Agents
Generates installable `.pkg` files for the Proximos system-level launch agents. Both packages install to `/Library/LaunchAgents/` with `root:wheel` ownership and `644` permissions, and load automatically on install.
* **Export Standard .pkg** — Builds `Proximos LaunchAgent.pkg`. Installs `com.enlazo.proximos.plist` to `/Library/LaunchAgents/`, keeping Proximos open in the menu bar full time for all users.
* **Export Headless .pkg** — Builds `Proximos Headless LaunchAgent.pkg`. Installs `com.enlazo.proximos.headless.plist` to `/Library/LaunchAgents/`, running `Proximos --check-for-updates` once daily at the **Daily Run Time** configured in Main Settings at the time the PKG was generated. The app is not kept open full time.
> Proximos must be installed in the same path that was active when the Launch Agent PKG was generated, as the binary path is baked into the plist at export time.
> If both a System Launch Agent and a user-level launch agent (created by the **Enable Proximos Launch Agent** setting) are present at the same time, the System Launch Agent takes priority. Proximos Launch Agent Manager will automatically detect and remove the user-level launch agent to prevent conflicts. See [Launch Agent Conflict Resolution](/proximos/mdm-deployment#launch-agent-conflict-resolution) for the full details and recommended deployment approach.
### Additional MDM Scripts
* **Export MDM Scripts** — Exports the `Proximos MDM Scripts` folder to a location you choose. This folder contains all provided deployment, removal, advanced, and standard MDM scripts, plus extension attribute scripts. See [Extra MDM Scripts](/proximos/extra-mdm-scripts) for a full description of each script.
***
## Command Line Tab
The Command Line tab displays the available CLI commands for Proximos with usage examples and descriptions, rendered in a scrollable reference view. All commands are documented in [Command Line Overview](/proximos/command-line-overview). The binary path (`/Applications/Utilities/Proximos.app/Contents/MacOS/Proximos`) is shown for reference.
***
## Help Tab
The Help tab is the support and maintenance hub. It is organized into five sections.
### Nudge Management
**Clear Nudge** — Kills any running Nudge process for the current user and unloads the Nudge LaunchAgent from their launchd session. Nudge resumes at the next scheduled Proximos run or restart. Clicking this button shows a confirmation alert: *"Nudge Cleared — Nudge has been temporarily disabled. It will resume at the next scheduled run."*
> This action is hidden in Managed Mode.
### Check for Application Updates
**Check for Proximos Updates** — Manually triggers a Sparkle update check for new versions of Proximos itself. Proximos does not check for its own updates automatically — all Proximos update checks are explicitly triggered from this button.
### Proximos Documentation
**Open** — Opens `https://docs.enlazosystems.com` in your default browser.
### Uninstall Proximos
**Uninstall Proximos** — Initiates the built-in Proximos uninstaller, completely removing Proximos and its settings files from the Mac.